ラズパイ0のOSMCでAmazonプライムビデオ(再生エラー) [Raspberry Pi]
Raspberry Pi Zero でOSMCを起動して,Amazonプライムビデオ再生を実行したら
Widevine CDM is Unfortunately not available on this system archirecture
こちらのサイトを参照してビデオ一覧の表示まで進んだが,再生できなかった。
ZeroはARMv6なので,アーキテクチャがWidevineのライブラリをサポートしてないとのこと。
https://discourse.osmc.tv/t/kodi-netflix-dont-work-on-pi-zero-w/75952
12月6日からのサイバーマンディで,Fire tv Stick が安くなれば,こちらを購入することにした。
Raspberry Pi Zero に Google Asistant サービスを入れてみる [Raspberry Pi]
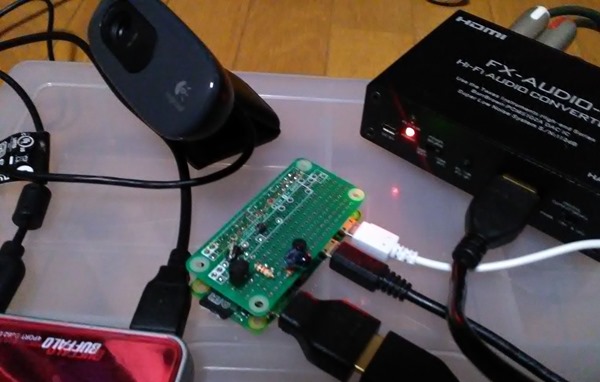
Raspberry Pi Zero にマイクはロジクール webcam C270 のUSBマイク,スピーカーはHDMI音声をコンバーターでGoogle Asistant を入れてみた。”OK Google” で会話を始めるホットワードはだめだったが,エンターキーで会話を始めるプッシュトークは動作した。Raspbian Busterでセットアップした。
こちらのサイトに手順が分かりやすく書かれている。
https://raspibb2.blogspot.com/2018/02/raspberry-pi-google-assistant-api-lirc.html
ただし,画像を見るとARMv7のRaspberry Pi 3のようで,Raspberry Pi Zero はARMv6,おそらくそのため動作しなかった。
この問題は,以下のページのやり方, grpc をソースからインストールすることで,プッシュトークのみかろうじて動作した。
https://github.com/googlesamples/assistant-sdk-python/issues/235#issuecomment-409523986
音声の設定関係と録音と再生ができるかを確認(USBマイクとHDMI出力の場合)
1 amixer cset numid=3 2
2 wget https://raw.githubusercontent.com/neuralassembly/raspi/master/asoundrc
3 mv asoundrc .asoundrc
4 arecord --format=S16_LE --duration=5 --rate=16000 --file-type=raw out.raw
5 aplay --format=S16_LE --rate=16000 out.raw
alsamixer で音量の調整
上記のサイトを参照して,Google Asistant サービスでプロジェクトを作成して,最終的にOauth 2.0 credential をダウンロード。
client_secret_xxxxxxxx.json を入手する。
1 sudo apt update
2 sudo apt install python3-dev python3-venv
3 python3 -m venv env
4 env/bin/python -m pip install --upgrade pip setuptools
5 source env/bin/activate
6 pip uninstall grpc grpcio
7 rm -rf ~/.cache/pip/*
8 sudo apt install libffi-dev libssl-dev
9 python -m pip install --upgrade --no-binary :all: grpcio
10 sudo apt install portaudio19-dev
11 python -m pip install --upgrade google-assistant-library
12 python -m pip install --upgrade google-assistant-sdk[samples]
13 python -m pip install --upgrade google-auth-oauthlib[tool]
14 google-oauthlib-tool --scope https://www.googleapis.com/auth/assistant-sdk-prototype --scope https://www.googleapis.com/auth/gcm --save --headless --client-secrets client_secret_123456789123 -3q1vmugtpgqeso1234eb2jsdq0dlehqi.apps.googleusercontent.com.json
6から9がzero(ARMv6)の場合のgrpcのソースビルドの手順
14は出力されるURLにアクセスして,activation code を転記して終了する。
Google asistant のサンプルプログラムを実行。
(env) pi@raspberrypi:~ $ googlesamples-assistant-hotword --project_id gatest-faXXX --device_model_id gatest-raspi-model
Segmentation fault
(env) pi@raspberrypi:~ $ googlesamples-assistant-pushtotalk --project-id gatest-faXXX --device-model-id gatest-raspi-model --lang ja_jp
INFO:root:Connecting to embeddedassistant.googleapis.com
INFO:root:Using device model gatest-raspi-model and device id a000000-00000-00ea-afed-000da000000
Press Enter to send a new request...
INFO:root:Recording audio request.
WARNING:root:SoundDeviceStream read overflow (3200, 6400)
INFO:root:Transcript of user request: "今日".
INFO:root:Transcript of user request: "今日の".
INFO:root:Transcript of user request: "今日のて".
INFO:root:Transcript of user request: "今日の天気".
INFO:root:Transcript of user request: "今日の天気は".
INFO:root:Transcript of user request: "今日の天気は".
INFO:root:End of audio request detected.
INFO:root:Stopping recording.
INFO:root:Transcript of user request: "今日の天気は".
INFO:root:Playing assistant response.
WARNING:root:SoundDeviceStream write underflow (size: 4000)
INFO:root:Finished playing assistant response.
Press Enter to send a new request...
googlesamples-assistant-hotword は Segmentation fault
googlesamples-assistant-pushtotalk はエンターキーを押して会話が始まった。
GoogleAIYProject のraspbian イメージもダウンロードしてみた。こちらはこれから。
https://github.com/google/aiyprojects-raspbian/releases
Kali Linux 2019.3 インストール Acer Aspire V5 [Kali Linux]
Acer Aspire V5 ノートに Kali linux をインストールした。
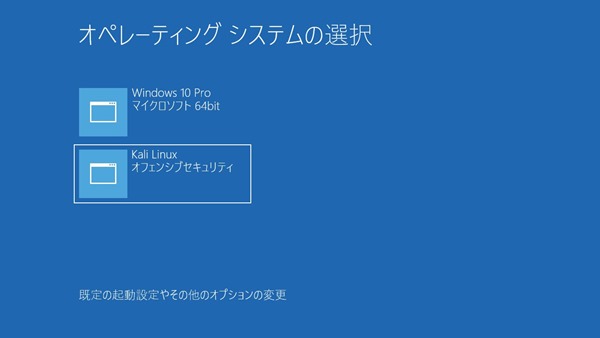
EasyBCD設定で,メトロブートローダーでWindows 10とデュアルブート。
Aspire V5ノートはレガシーBIOSなのでEasyBCDで設定できるが,UEFIはできないかもしれない。
デュアルブートのインストール方法等は変わってないのでこちら
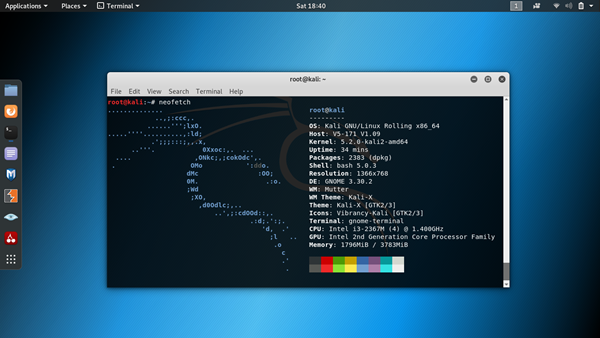
Kali Linux は,neofetchコマンドでシステム情報を表示 apt install neotech
Aspire V5ノートでは,synaptics製タッチパットのタップが反応しないので,起動時に modprobe でpsmouseモジュールを再ロードするようにした。
touchpad.desktop ファイルを~/.config/autostartディレクトリに新規作成
root@kali:~/.config/autostart# cat touchpad.desktop
[Desktop Entry]
Name=MyScript
GenericName=A descriptive name
Comment=touchpad
Exec=/root/touchpad.sh
Terminal=false
Type=Application
X-GNOME-Autostart-enabled=true
起動時に作成したスクリプト touchpad.sh を実行
#!/bin/sh
modprobe –r psmouse
modprobe psmouse proto=imps
/etc/modprobe.dディレクトリに conf ファイルを作る方法(こちら)は機能しなかった。


